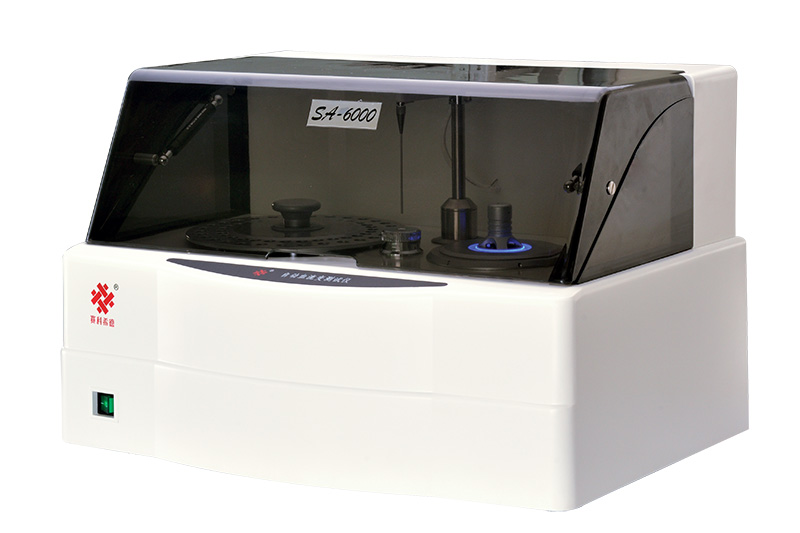
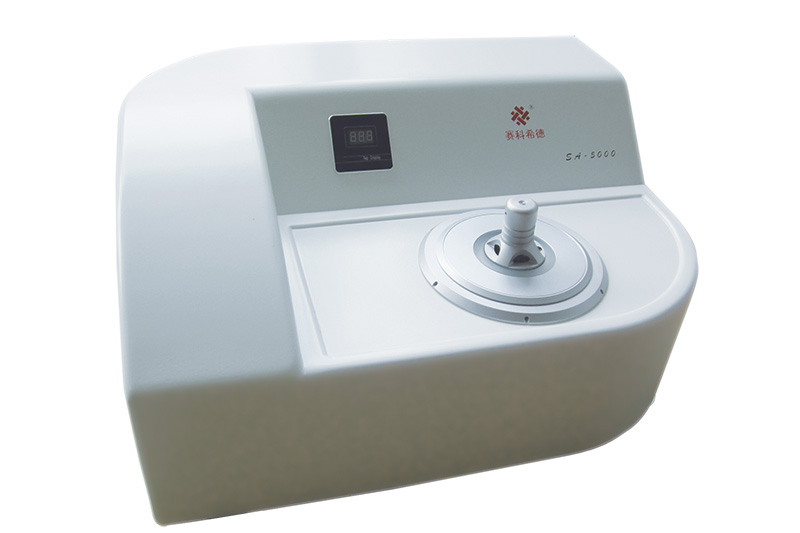
SA-6000 automated blood rheology analyzer adopts cone/plate type measurement mode. The product imposes a controlled stress on the fluid to be measured through a low inertial torque motor. The drive shaft is maintained in the central position by a low resistance magnetic levitation bearing, which transfers the imposed stress to the fluid to be measured and whose measuring head is cone-plate type. The whole mensuration is automatically controlled by the computer. The shear rate can be set randomly at the range of (1~200) s-1, and can trace two-dimensional curve for shear rate and viscosity in real time. The measuring principle is drawn on the Newton Viscidity Theorem.

| Model | SA-6000 |
| Principle | Rotation method |
| Method | Cone plate method |
| Signal collection | High-precision raster subdivision technology |
| Working Mode | / |
| Function | / |
| Accuracy | ≤±1% |
| CV | CV≤1% |
| Shear rate | (1~200)s-1 |
| Viscosity | (0~60)mPa.s |
| Shear stress | (0-12000)mPa |
| Sampling volume | ≤800ul |
| Mechanism | Titanium alloy, jewel bearing |
| Sample position | 60 sample position with single rack |
| Test channel | 1 |
| Liquid system | Dual squeezing peristaltic pump,Probe with liquid sensor and automatic-plasma-separation function |
| Interface | RS-232/485/USB |
| Temperature | 37℃±0.1℃ |
| Control | L-J control chart with save, query, print function; |
| Original Non-Newtonian fluid control with SFDA certification. | |
| Calibration | Newtonian fluid calibrated by national primary viscosity liquid; |
| Non-Newtonian fluid win national standard marker certification by AQSIQ of China. | |
| Report | Open |
There is a calibration function in the instrument test software. The standard viscosity liquid prepared by the National Standard Material Research Center is adopted.
1. When is calibration required:
1.1 The instrument is initially installed.
1.2 The instrument is moved, the computer system or the viscosity meter is changed or replaced.
1.3 After using the instrument for a period of time, it is found that the measured value of the instrument has obvious deviation.
☆Note: Before the instrument is calibrated, the horizontal position of the test movement should be adjusted: place the level meter on the test movement platform, and turn the adjustment knob at the bottom of the instrument to place the bubbles in the small circle of the level meter.
2. Zero calibration:
Without adding any liquid in the test liquid pool, click the “Add Standard Sample” button in the [Calibration Interface], an “input dialog box” appears, enter the viscosity value: 0, click “OK”, and the instrument will start the zero point calibration test; The system prompts to save the zero calibration result.
3. Standard viscosity fluid calibration:
3.1 Use a pipette to add 0.8ml of standard viscosity liquid to the test liquid pool, click the “Add Standard Sample” button in the [calibration interface], and an “input dialog box” appears, enter the standard viscosity liquid added to the test liquid pool Viscosity value, click the “OK” button, and the instrument will start the standard viscosity fluid calibration test;
3.2 After the calibration test is over, the green calibration curve will be displayed in the shear rate-viscosity coordinate;
3.3 Display the viscosity and parameters of the viscosity fluid corresponding to all calibration curves in the “standard sample list” box
4. Delete the calibration curve
4.1 In the “standard sample list” box, use the mouse to select a group of horizontal data. At this time, the data is covered by the blue color bar, and the corresponding curve in the corresponding shear rate-viscosity coordinate turns to yellow. Click the “delete standard sample” button, Then the calibration curve disappears in the coordinates, and the corresponding number in the “standard sample list” box disappears;
4.2 Keep at least one calibration curve for zero point, one for high-viscosity (about 27.0mPa•s) and one for low-viscosity (about 7.0mPa•s) to ensure normal testing of the instrument.
☆Note: Please do not perform calibration operations without authorization, so as not to cause confusion in the internal parameters of the instrument system and affect the accuracy and precision of the test. If you must perform a calibration operation, please keep the original parameter records in order to restore the original data.
5. Capillary calibration
Put an empty test tube into the No. 1 hole of the sample tray and add 3ml of distilled water, click the “Settings” menu, and select
“Capillary calibration”. Then click “Recalibrate” and “OK”. The instrument will automatically perform three calibrations. After calibration, click “Accept”, and finally click “Yes” to save the new calibration parameters.


 Business card
 Chinese WeChat